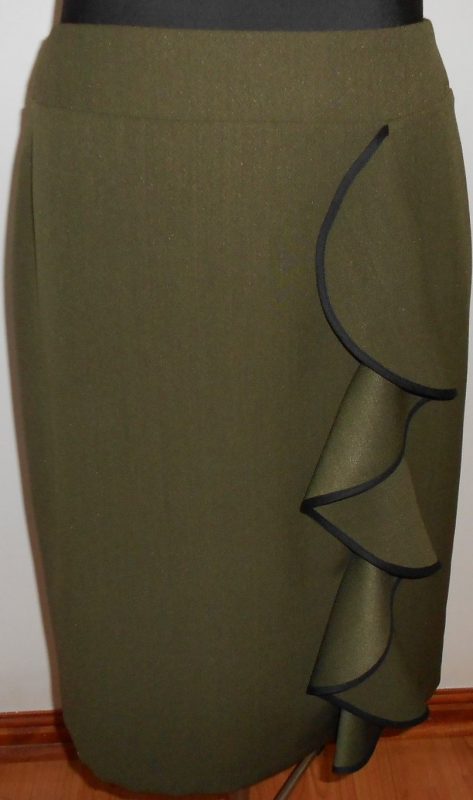
Flounces can be added to a garment along the hemline, armholes, necklines, and seams and can be added as a peplum on the edge of a jacket or top. Even though flounces and frills are not to everyone’s liking, it is still good to know how they are drafted. Flounces are drafted circularly, while a ruffle is a rectangular piece of fabric that is cut on the straight grain. Read the post Three Ways to Gather Fabric for the Ruffles Tutorial. Most lightweight and medium-weight fabrics are suitable to use for flounces. It is best to decide on the amount of fullness required before drafting your pattern. Below is an example of a slash and spread method I used at the edge of the sleeve.

Method 1: Slash and Spread
The slash-and-spread method is probably the easiest method of all and is used for shaped as well as circular flounces. Draft the required width and length of the flounce. Add hem and seam allowance. Draw lines with even spacing along with the pattern. Place a strip of sticky tape along the top edge of the pattern to prevent tearing while slashing the pattern.
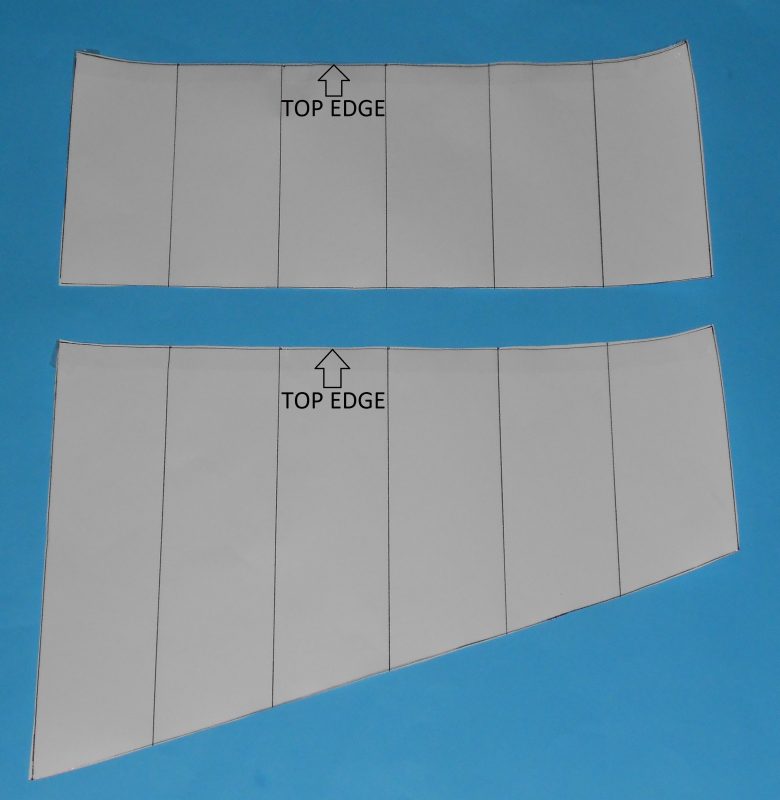
Slash the pattern up to within 2 mm of the top edge.
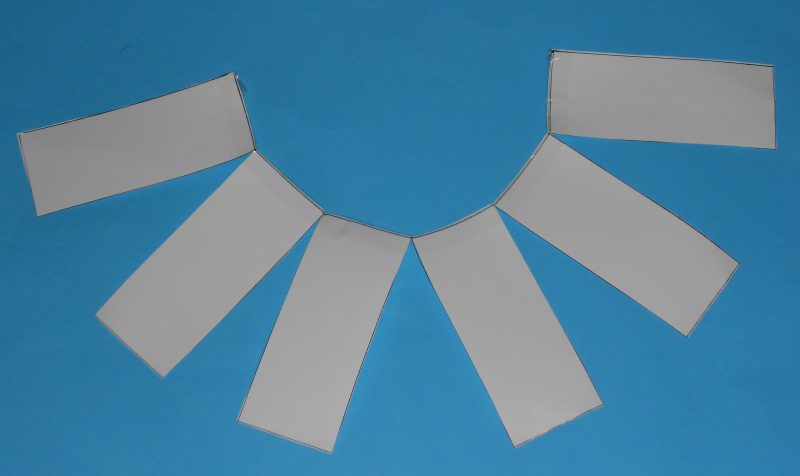
Place the slashed pattern on another sheet of paper and spread the slashed sections evenly to the desired width. Secure the sections with tape or glue.
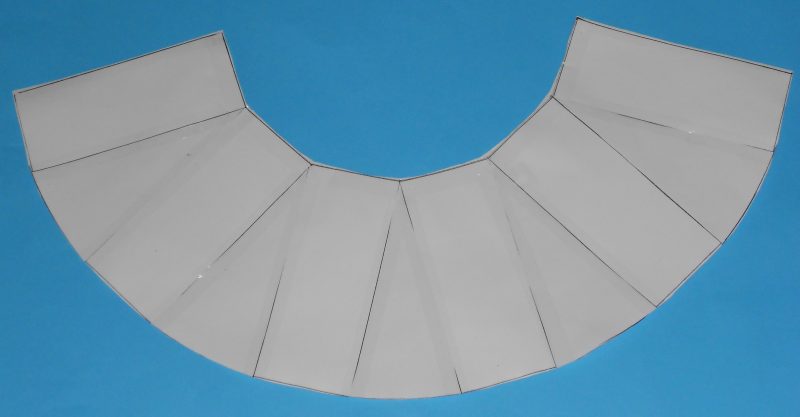
Cut the flounce out.

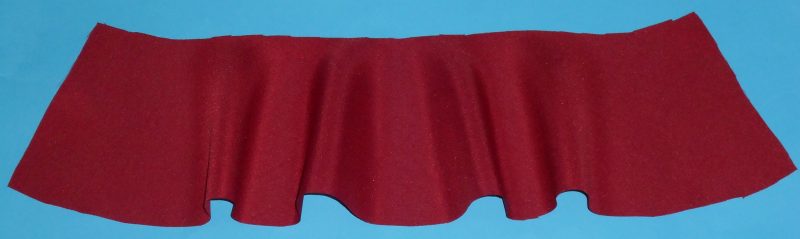
Note that the flounce has more fullness at the bottom and a smooth seam at the top.

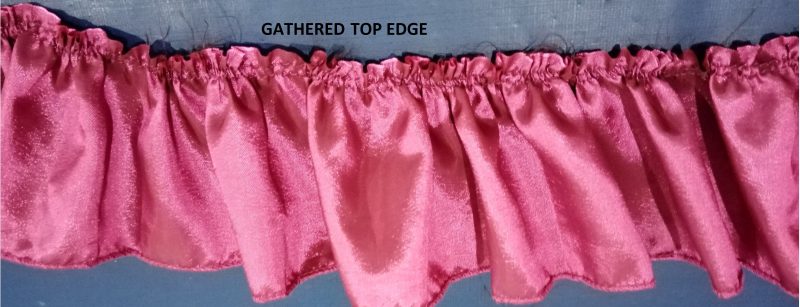
A ruffle has fullness at the top and bottom.
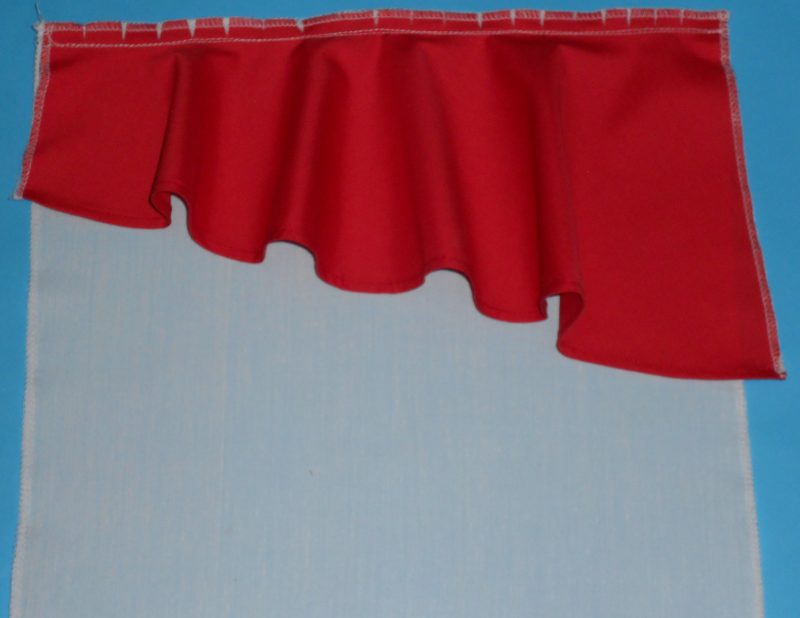
Staystitch the top edge of the flounce and clip the seam allowance evenly. Sew the hem of the flounce with a rolled hem, narrow hem, or double-folded hem before attaching it to the intended edge.

With right sides together, pin the flounce to the garment edge and stitch in place.

Neaten the raw edges. The hemline of this shaped sample was finished with a double-folded hem.
Method 2: The Spiral
This method is suitable for narrow flounces. It is less full and can be used in garments and décor projects. Start drawing a small circle and measure your required width and length along the spiral.
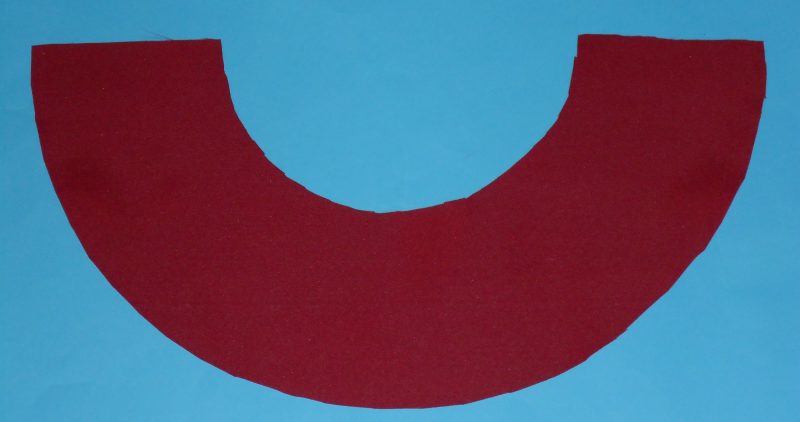
Method 3: Full-Circle Flounce
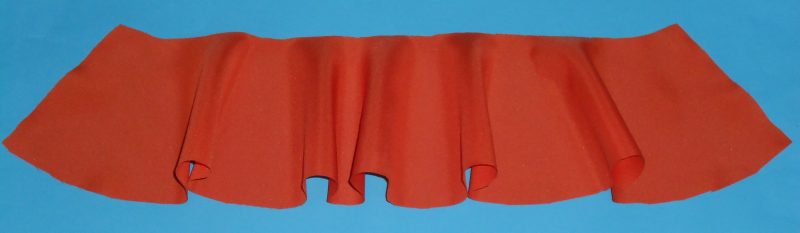
Below is an example of a full-circle flounce.
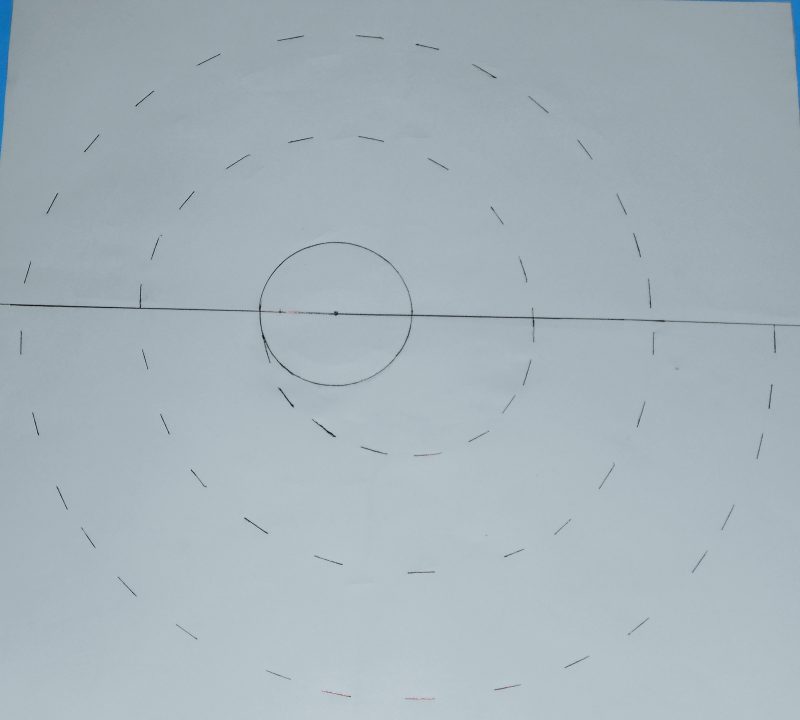
Measure the edge where you would like to attach the flounce. The required length of that edge will be the circumference of the inner circle, as illustrated below. I used an example of a 30 cm length. Calculate as follows:
(Pi = 3.14) x 2 = 6.28
The circumference is 30 cm divided by 6.28, or 4.78 (radius).
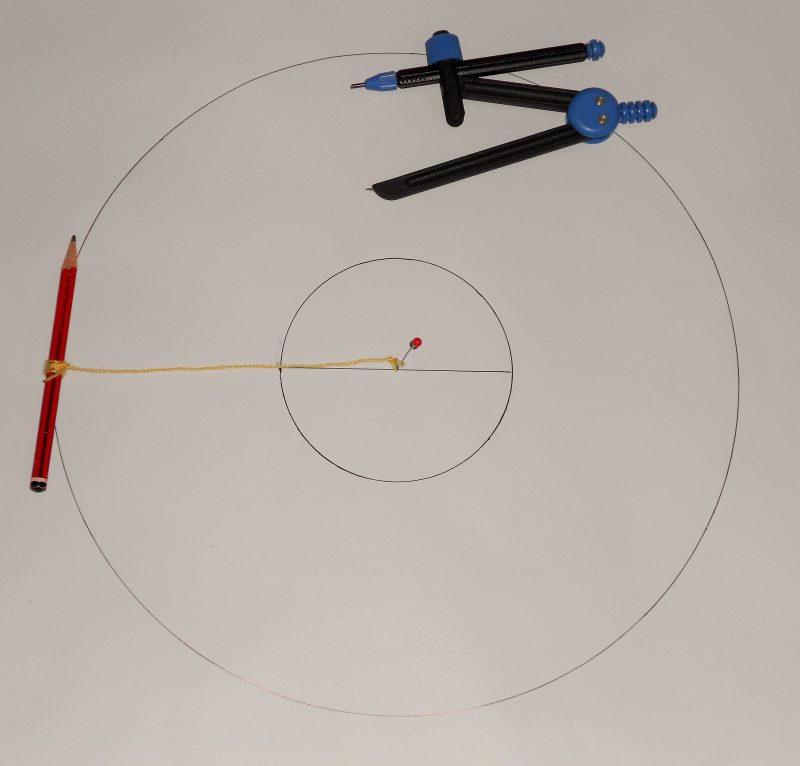
Use a compass or a marking pen attached to a piece of string. Draw the inner circle, which should measure the required length of the flounce. Decide on the width of the flounce and draw the outer circle.

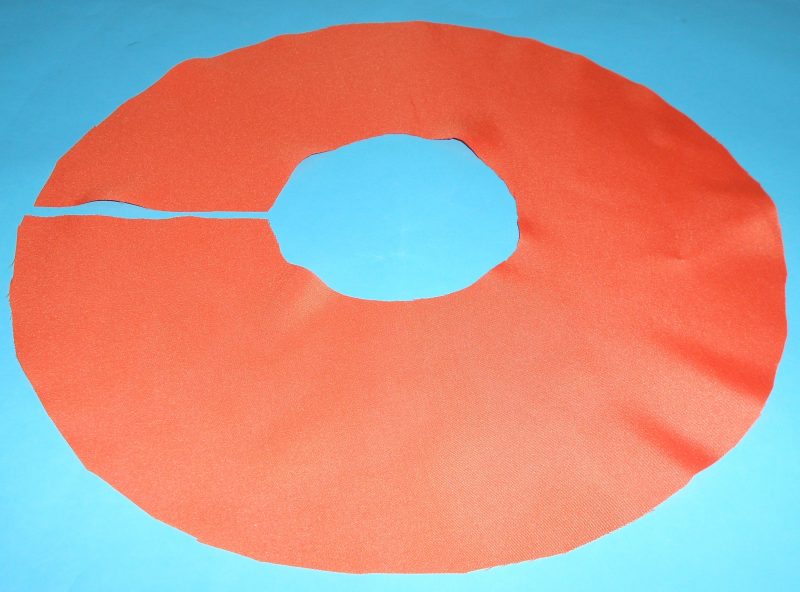
Add hem and seam allowance. Cut the inner circle out and cut the flounce out.
Sew the circular flounce in the same manner described in the slash and spread method.
Method 4: Half-Circle Flounce
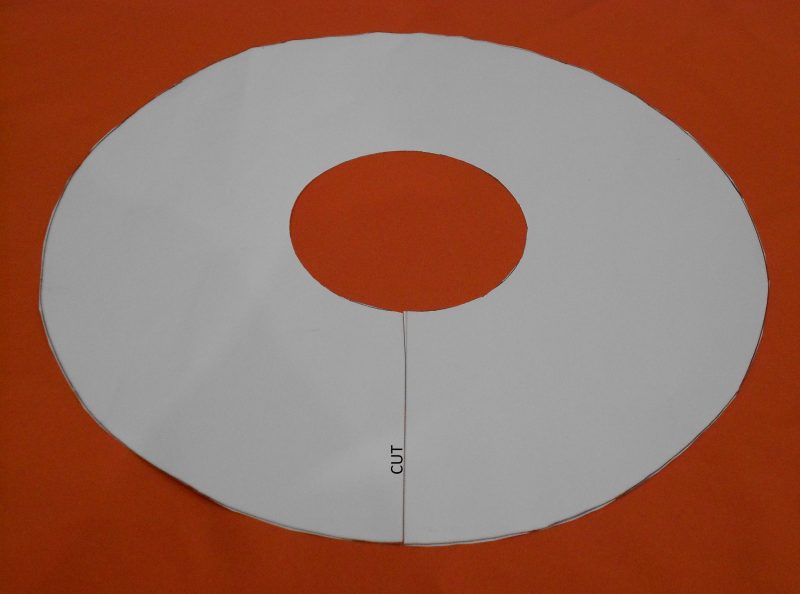
Draw a half-circle that measures 30 cm and has the required width.
Calculate the half-circle as follows:
30 cm divided by 3.14 = 9.5 cm (radius).
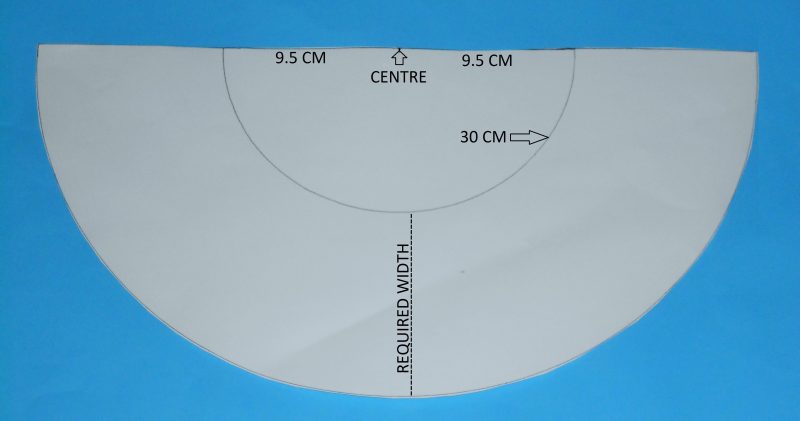
Add hem and seam allowance. Cut the inner section of the pattern out as illustrated.
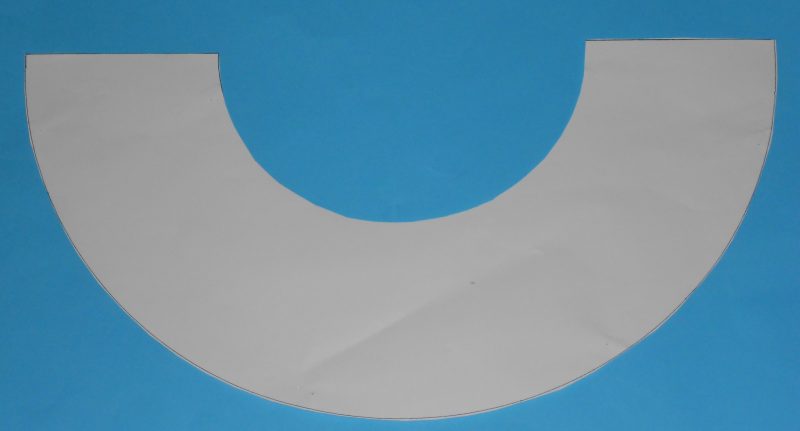
Cut the flounce out.